If you love your home and your neighbourhood but are constantly feeling just a little too cramped, you've likely daydreamed about a full-scale home addition. You've imagined the new family room, the sprawling primary suite, or the massive dream kitchen. And then, just as quickly, you've imagined the price tag, the months of disruption, and the sheer scale of the project, and you've put that dream back on the shelf.
But what if there was a powerful compromise? What if you could gain the high-impact space you crave without the cost, time, and complexity of a massive, multi-room addition?
Welcome to the world of the "bump-out." A bump-out is a small-scale home addition, typically extending an existing room by as little as two or three feet and as much as 10 to 15 feet. Unlike a full addition, which often involves creating entirely new rooms and complex new rooflines, a bump-out is designed to expand the footprint of a single room. It's a strategic, targeted expansion that solves a specific problem—like a cramped kitchen, a tiny bathroom, or a nonexistent dining area—with maximum efficiency and impact.
This guide will explore the power of the bump-out, from what it is (and isn't) to the types of projects it's perfect for, and the construction considerations you need to know.
What Defines a Bump-Out Addition?
The line between a "bump-out" and a "full addition" can be blurry, but the distinction generally comes down to scale, foundation, and roofline.
Scale: A bump-out is focused on expanding a room, not creating a new one. It might make your kitchen 50% larger, but it doesn't add a new kitchen and a new bathroom.
Foundation: This is the biggest differentiator. While a large bump-out might require a full frost-depth foundation just like a large addition, many smaller "micro-additions" can be cantilevered. This means the addition is supported by joists that extend from the main house structure, eliminating the need for extensive excavation and concrete work. This single factor is a primary driver of cost savings.
Roofline: A bump-out typically doesn't involve a complex new roof structure. The roof is often a simple shed-style roof that ties into the existing wall, or the existing roof overhang is simply extended to cover the new space.
Think of it this way: a full addition changes the entire character and mass of your home, while a bump-out strategically enhances it.
The Power of a Few Feet: Where Bump-Outs Shine
You would be astonished at what an extra 2 feet of depth in a room can do. That small, seemingly insignificant amount of space can completely reorganize a floor plan, improve traffic flow, and unlock new design possibilities.
Here are the most common and high-impact applications for a bump-out.
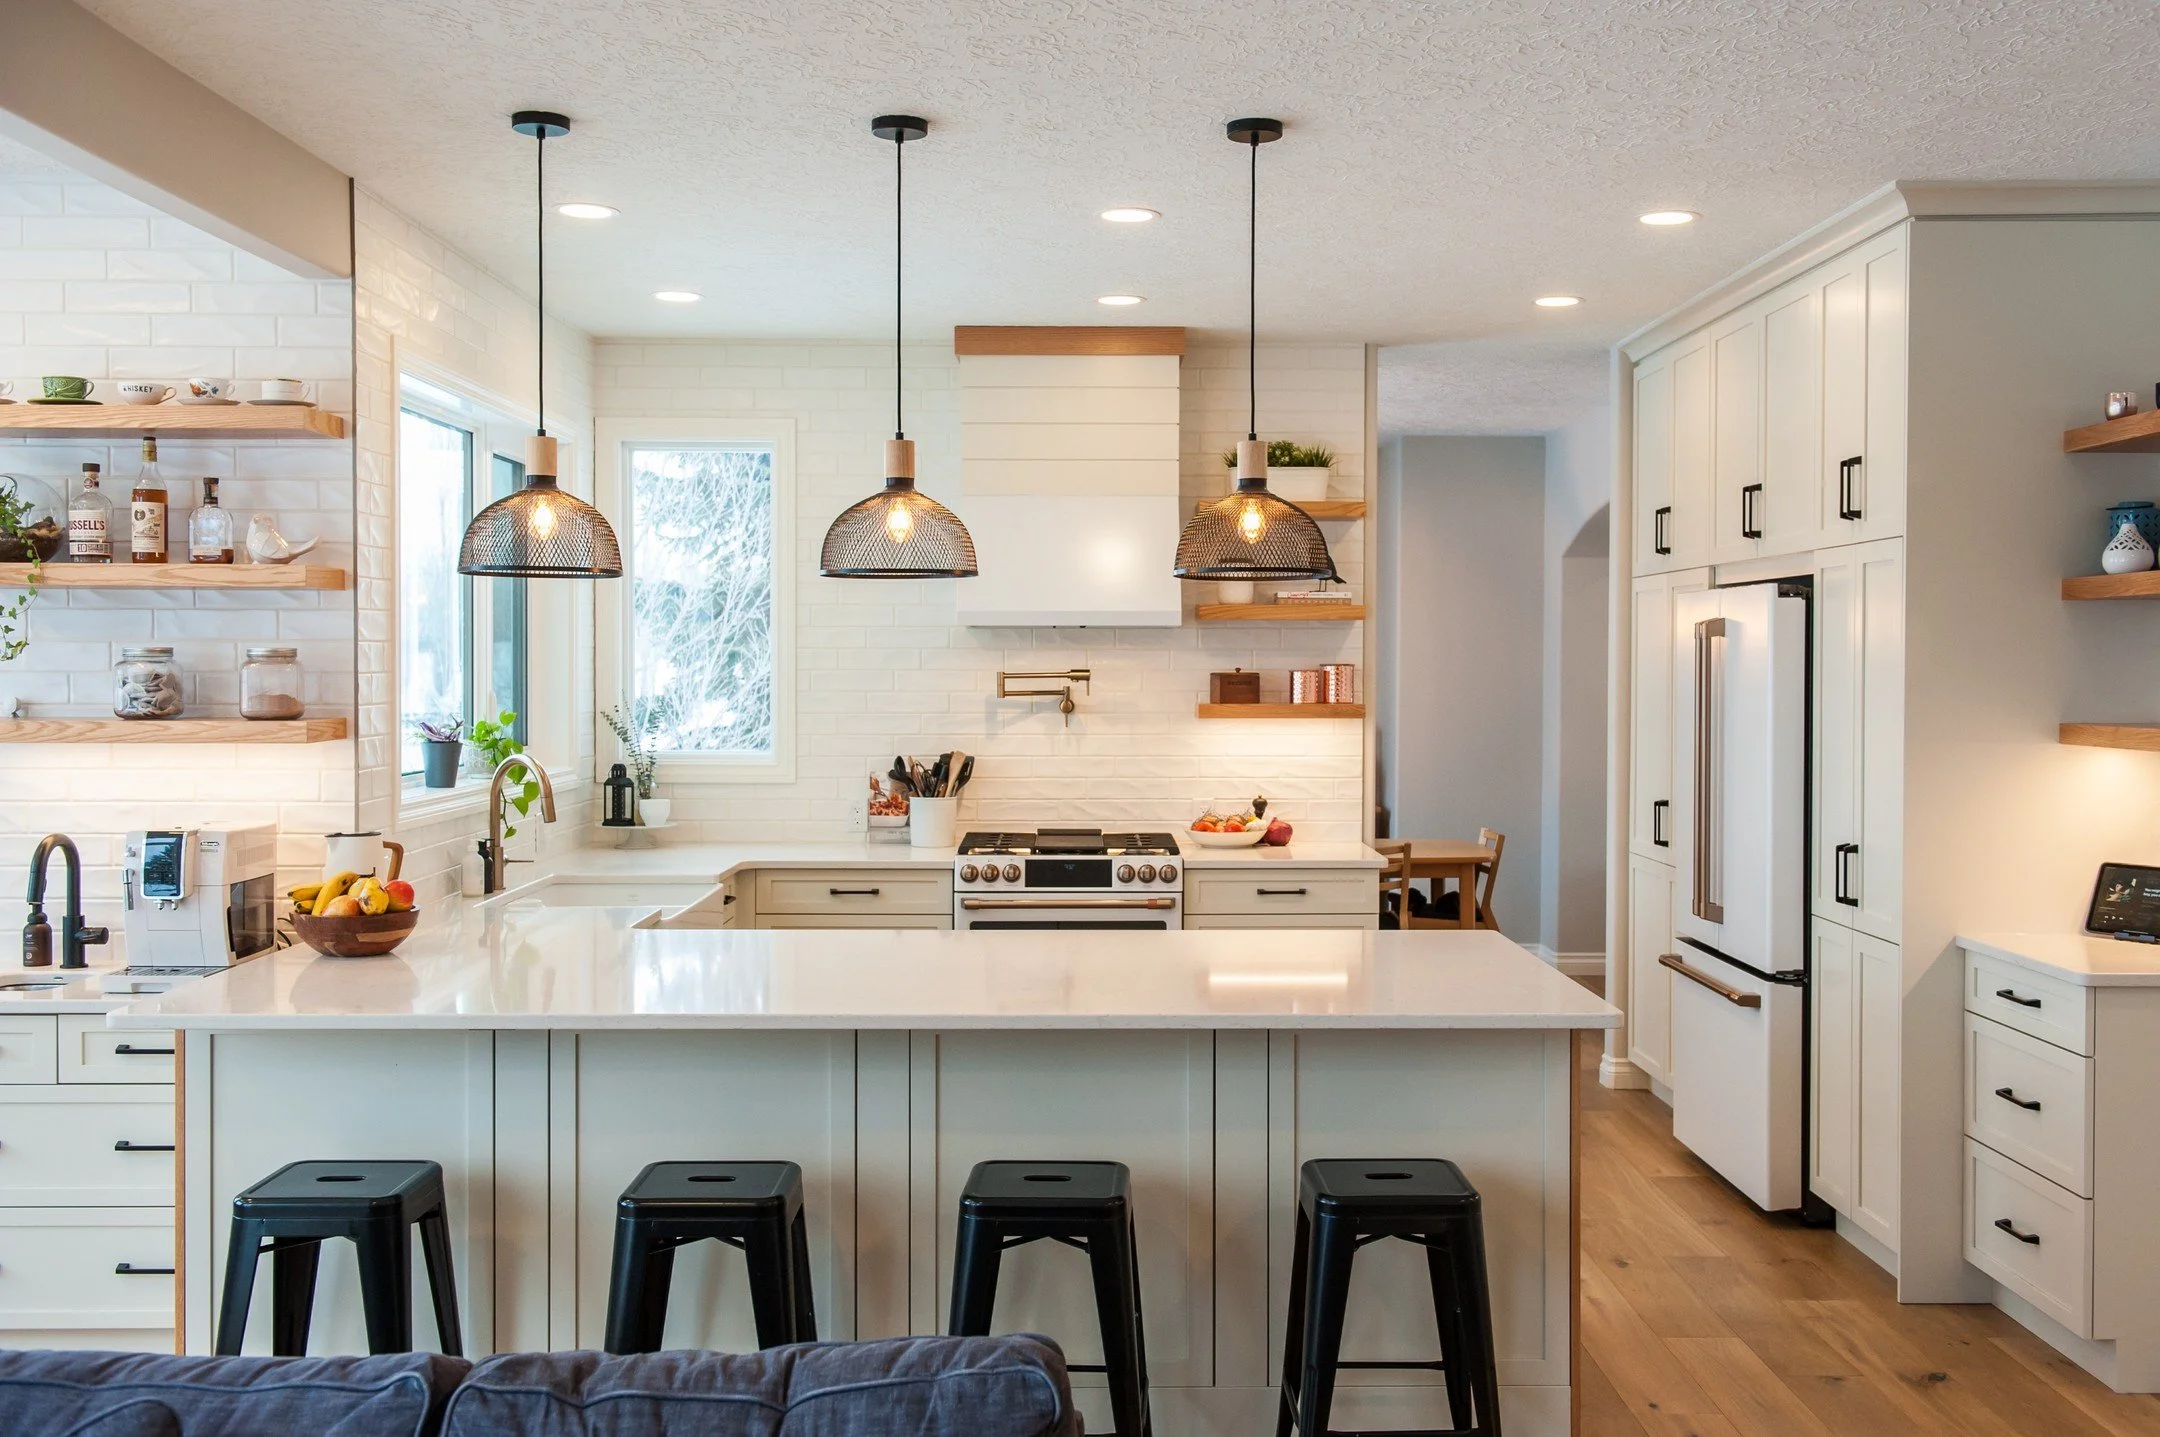
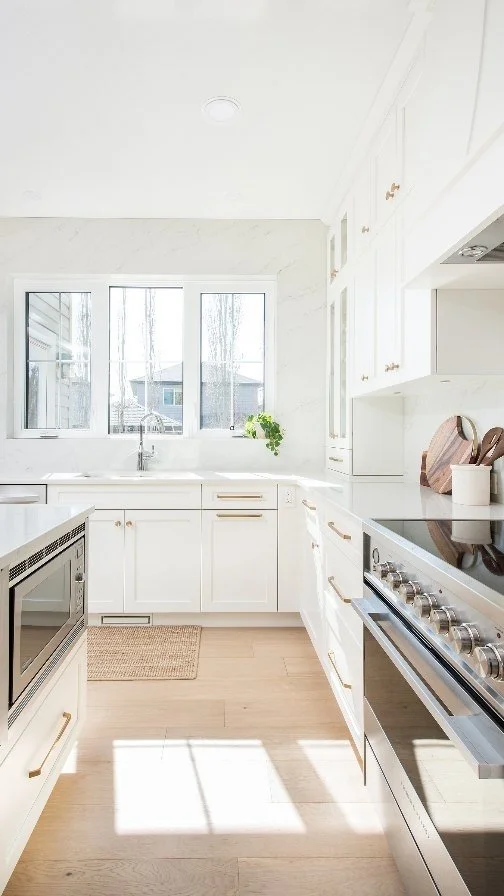
1. The Kitchen Expansion
This is, without a doubt, the most popular use for a bump-out. Older homes, in particular, are notorious for small, galley-style, or U-shaped kitchens that are a nightmare for both cooking and entertaining.
A bump-out of just three to four feet can fundamentally change the entire room by:
Adding a Kitchen Island: This is the number one request. That extra sliver of space provides the necessary clearance to add a functional island for prep, seating, and storage, transforming a one-person galley into a social hub.
Creating a U-Shaped or L-Shaped Layout: A bump-out can provide the space to add a full new "wall" of cabinetry and countertops, turning a cramped L-shaped kitchen into a spacious and efficient U-shaped one.
Allowing for a Dining Nook: A small "box bay" bump-out, often filled with windows, is the perfect way to add a built-in breakfast nook or banquette, freeing up floor space in the rest of the kitchen and creating a charming focal point.
Improving Appliance Layout: It can finally provide the space to move the refrigerator out of a main walkway or add the double-wall ovens and dedicated pantry cabinet you've always wanted.
2. The Luxurious Bathroom
Is your primary bathroom a tiny, cramped space where you can barely turn around? Or perhaps you have a main-floor powder room that feels like a closet?
The Full Bath Transformation: A bump-out of just two or three feet in a standard 5'x8' bathroom can be life-changing. It provides the space to move from a tiny vanity to a full double vanity. It can also create the room needed to replace a cramped tub-shower combo with a separate, luxurious walk-in shower and a freestanding soaking tub.
The Accessible Main-Floor Bath: For those planning to age in place, a bump-out can provide the necessary square footage to convert a tiny half-bath into a full, accessible bathroom with a zero-threshold, curbless shower and proper turning radius for a walker or wheelchair.
3. The Functional Family Room or Living Room
Many living rooms are long and narrow, making furniture placement awkward. A bump-out along one of the long walls can "square up" the room, creating a much more balanced and functional space.
The Fireplace and Built-In Nook: A bump-out can be used to create a beautiful focal point, such as a new fireplace flanked by custom, built-in bookshelves and window seats.
The "TV Wall": It can provide a dedicated space for a media console, allowing you to rearrange the furniture more conversationally and logically.
4. The Usable Dining Room
In many homes, the "dining room" is just one end of the living room, with the table constantly scraping the wall. A 10-foot-wide by 3-foot deep bump-out can create a dedicated alcove for a full-sized dining table, finally giving it a sense of place and freeing up your main living area.
5. The Primary Bedroom Retreat
A bump-out in a primary bedroom can create the space for those little luxuries that make a room feel like a true retreat.
Walk-In Closet: A 4-foot by 8-foot bump-out can be all you need to create a modest but highly functional walk-in closet, freeing up your bedroom from bulky dressers.
Sitting Area: A small alcove with a large window is the perfect spot for a reading chair and a small table, giving you a quiet place to unwind that isn't your bed.
Types of Bump-Outs: From Micro to Macro
Not all bump-out additions are built the same. The type you choose will depend on your budget, your goals, and the existing structure of your home.
1. The Cantilevered Bump-Out (Micro-Addition)
This is the smallest and most cost-effective type of bump-out.
How it works: This addition is not supported by a foundation. Instead, the floor joists are extended (or "cantilevered") from the main house structure to support the new floor. Think of a balcony, but fully enclosed.
Limitations: Because it's "hanging" off the house, it has size and weight limitations. It's typically limited to a depth of two to four feet.
Best For: Creating a window seat, a breakfast nook, adding a fireplace surround, or gaining just enough space in a bathroom for a double vanity or a soaking tub. This is the ultimate "small expansion, big impact" solution.
2. The Foundation-Supported Bump-Out (Macro-Addition)
This is a larger, more substantial addition that behaves more like a traditional addition, just on a smaller scale.
How it works: This type of bump-out is supported by its own foundation. This typically means excavating and pouring concrete footings and a short foundation wall (or "pony wall") that ties into your home's existing foundation.
Benefits: Because it's fully supported from the ground up, a foundation-supported bump-out can be much larger—extending 10, 12, or even 15 feet from the home. It can also be a two-story addition, expanding a kitchen on the main floor and the primary bedroom above it simultaneously.
Best For: Large-scale kitchen remodels that involve adding an island and significant new counter space, major family room expansions, or adding a full bathroom.
The Planning and Construction Process: What to Expect
While a bump-out is less disruptive than a full addition, it is still a major renovation. It involves exterior and interior work, multiple trades, and a high level of coordination. A professional design-build or renovation contractor is essential to ensure it is done correctly, safely, and seamlessly.
Here is a general overview of the process:
1. Design, Feasibility, and Budgeting
This is the most important phase. A professional renovator will work with you to:
Define Your "Why": What problem are you trying to solve? Is it storage, flow, or function? This will determine the ideal size of the bump-out.
Conduct a Feasibility Study: Your contractor will assess your home's structure, the lot, and local zoning.
Zoning & Setbacks: Every municipality has rules about how close you can build to your property lines. A survey (Real Property Report) will be needed to confirm you have the space to expand.
Utilities: Are there gas, electric, or water lines buried where you want to dig? These will need to be located.
Structural Review: How will the new structure tie into the old one? What load-bearing walls are involved?
Develop Plans and a Budget: Once feasibility is confirmed, detailed drawings will be created. These plans are what a skilled contractor will use to provide a fixed-price contract, so there are no surprises.
2. Permits and Engineering
A bump-out is a structural change to your home. It is not a "handyman" project. It will require:
Building Permits: Your contractor will submit the architectural plans to your local municipality for approval.
Engineering: A structural engineer will need to review the plans and provide specifications for how to cut the opening in your existing home, how to support the new structure, and how to properly construct the cantilever or new foundation. This is a non-negotiable step to ensure your home's safety and integrity.
3. The Construction Phase
Once permits are in hand, the work begins.
Site Prep: The exterior area is prepped. This may involve removing a deck, relocating landscaping, and protecting the surrounding area.
Foundation or Cantilever: For a supported bump-out, excavation and concrete work come first. For a cantilever, the existing rim joist is opened up, and the new joists are installed.
Framing: The new floor, walls, and roof are built and sheathed. This is when you'll first see the new space take shape.
The "Break-Through": This is a critical milestone. The crew will build a temporary, dust-proof wall on the inside of your home. They will then remove the exterior wall (siding, sheathing, and studs) to connect the new space to the old. This is the most disruptive part of the project, but it is usually contained to a few days.
Tie-Ins:
Roofing & Siding: The new roof is tied into the old one, and new siding and exterior trim are installed. The goal is to make it look "seamless," as if it were always part of the house.
HVAC: Your heating and cooling will need to be extended. This may involve new ductwork to properly service the new square footage.
Electrical & Plumbing: New wiring for outlets, lights, and switches is run, as well as any plumbing lines for a new tub, sink, or dishwasher.
Insulation and Vapour Barrier: This is one of the most critical steps, especially in a cold climate. The new space must be properly insulated (spray foam is an excellent choice for bump-outs) and sealed to prevent drafts and ice damming.
Interior Finishes: This is the final, exciting stage. Drywall is hung and mudded, painting is completed, and new flooring is installed. The goal is to feather the new flooring into the old for a continuous, clean look.
Final Touches: Cabinets, countertops, light fixtures, and plumbing fixtures are all installed, and the project is professionally cleaned.
Important Considerations Before You Build
A bump-out is an excellent solution, but it's important to go in with your eyes open.
Cost vs. Impact: A cantilevered bump-out is cheaper than a foundation-supported one, but it also provides less space. You'll need to work with your contractor to find the "sweet spot" where the cost per square foot delivers the impact you need.
Seamless Design is Key: The biggest risk of a bump-out is that it looks "stuck on" to the house. An experienced design-build firm will be essential. They will know how to match your roof pitch, siding, and window styles to ensure the addition looks like it was part of the home's original design.
The Disruption: While less than a full addition, a bump-out is still a major project. The room being expanded will be a construction zone for weeks or months. You will have a temporary wall up, and there will be dust and noise.
Property Taxes: Any time you add permanent square footage to your home, your home's assessed value will increase. This will, in turn, increase your property taxes. It's a long-term cost of ownership to factor in.
Energy Efficiency: When you create a new "corner" of your home, you are creating more exterior wall space. This is why high-quality windows, proper insulation, and a meticulous air seal are absolutely critical. Cutting corners here will lead to a cold, drafty room and high energy bills for years to come.
Conclusion
For many homeowners, a bump-out addition is the perfect, pragmatic solution. It's a "just right" approach to renovation that sits between a simple interior remodel and a massive, complex home addition.
By strategically adding just a few feet, you can completely redefine a room, solving its fundamental problems without overspending or overbuilding. You can get the dream kitchen island, the luxurious walk-in shower, or the charming breakfast nook that transforms how you live in your home every single day. It proves that when it comes to home design, sometimes the smallest changes truly do make the biggest impact.
If you're feeling cramped, a bump-out addition might be the perfect solution to transform your kitchen, bathroom, or living area. Contact Diamond Contracting today to discuss your ideas. Our design-build team can help you explore your options and create the beautiful, functional space you’ve been dreaming of.